Exercises for Shoulder Impingement, from a PT
Advice to improve your movement, fitness, and overall health from the world's #1 in orthopedics.
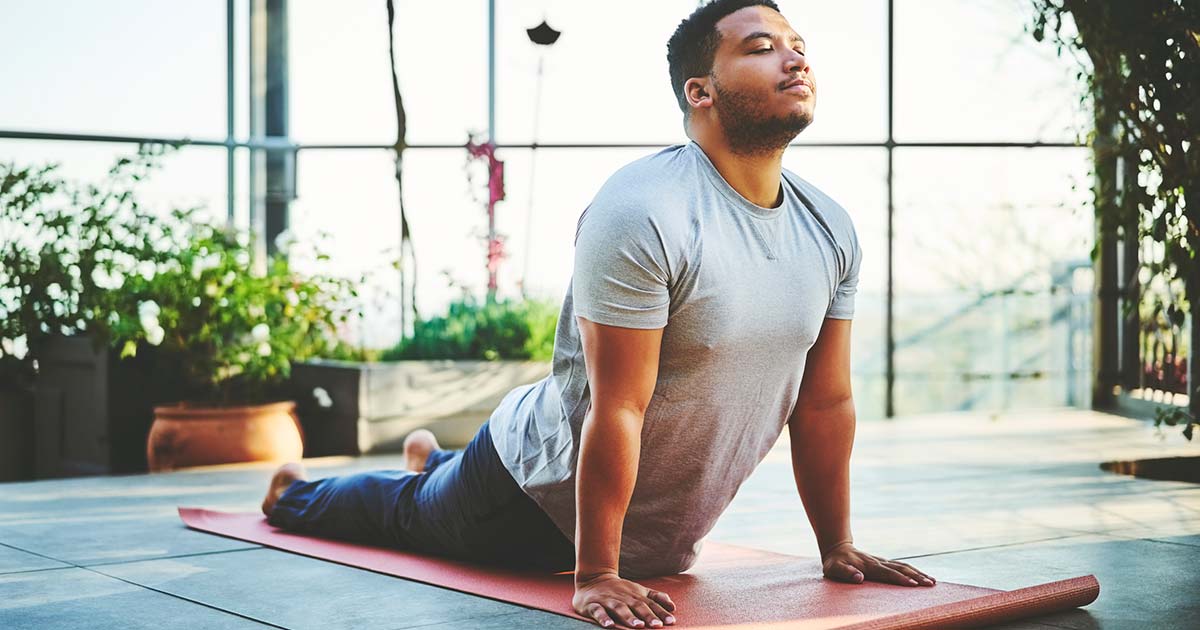
You may have heard the term shoulder impingement, either because you’ve been diagnosed with it yourself or know someone else who has.
“Shoulder impingement is one of the most common diagnoses for shoulder pain,” says Nicholas Hershfield, PT, DPT, an orthopedic clinical specialist at HSS Rehabilitation 75th Street. “It’s usually nonspecific and comes on insidiously, meaning on its own and not from an injury.”

The proper name for the condition is subacromial pain syndrome. This is an umbrella term that refers to pain under the acromion, the top outer edge of the shoulder bone. As many as two-thirds of people experience subacromial pain in their lifetime, though it is more common in older adults, says Hershfield.
Subacromial pain can occur in:
- the rotator cuff (the muscles and tendons surrounding the shoulder joint);
- the biceps tendon (which connects the biceps muscle to the shoulder bone);
- the labrum (tissue or cartilage around the shoulder socket); or
- the bursa (fluid-filled sacs in the shoulder joint).
Typically, subacromial pain is caused by an overload issue, meaning a stress that the shoulder wasn’t prepared to bear. It could be as simple as picking up a 10-pound weight, feeling a twinge in your shoulder area, and later experiencing a painful pinching sensation in your shoulder when you raise your arm. It can be common in young athletes who bench press heavy weights without building up their shoulder strength first.
If you are experiencing subacromial pain, Hershfield recommends three simple exercises to do at home to strengthen your shoulder:
Isometric Shoulder Internal and External Rotation
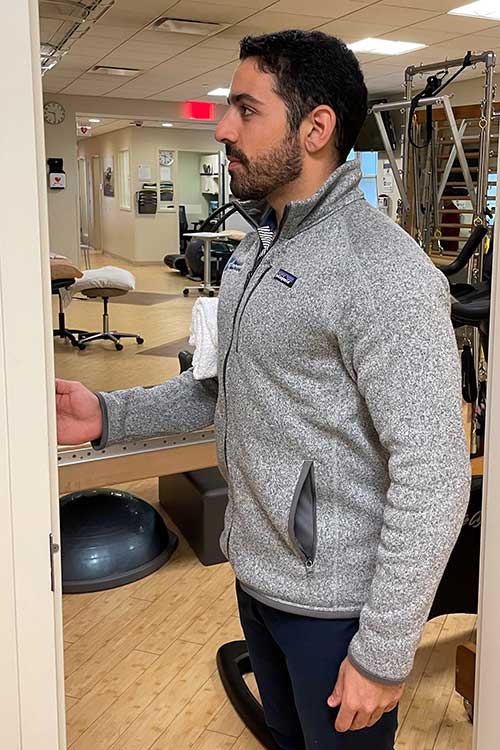
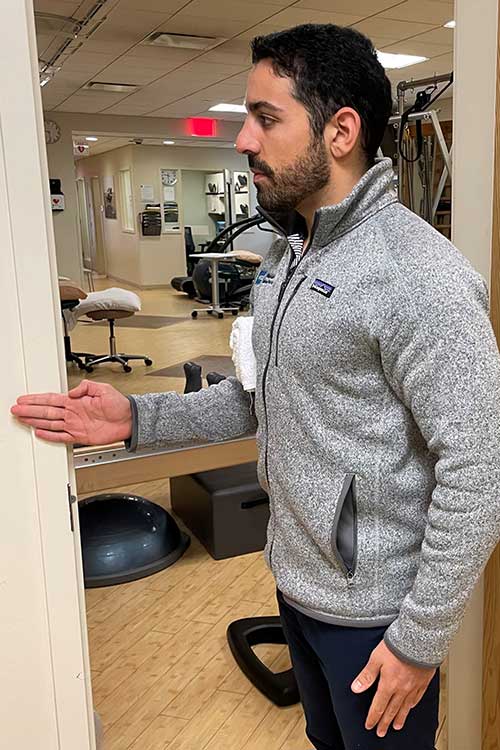
This exercise strengthens the rotator cuff muscles and tendons around your shoulder joint, increasing how much weight your shoulder can support.
- Place a rolled-up towel under the arm of the shoulder that is experiencing pain.
- Stand at the corner of a wall with your elbow bent at a 90-degree angle in front of you.
- With a flat hand, push into the wall at 25- to 50-percent pressure.
- Hold the push for 10 seconds, repeating the exercise 10 times. This is the internal rotation.
- Then turn your body so you can press the outside of your hand into the wall. Push into the wall with the outside of your hand at 25- to 50-percent pressure.
- Hold the push for 10 seconds, repeating the exercise 10 times. This is the external rotation.
You might feel a mild burn in the outside of the shoulder when doing this exercise, Hershfield says. Gradually, you can build up to a stronger pressure, as long as it doesn’t cause pain.
Side-Lying Shoulder External Rotation

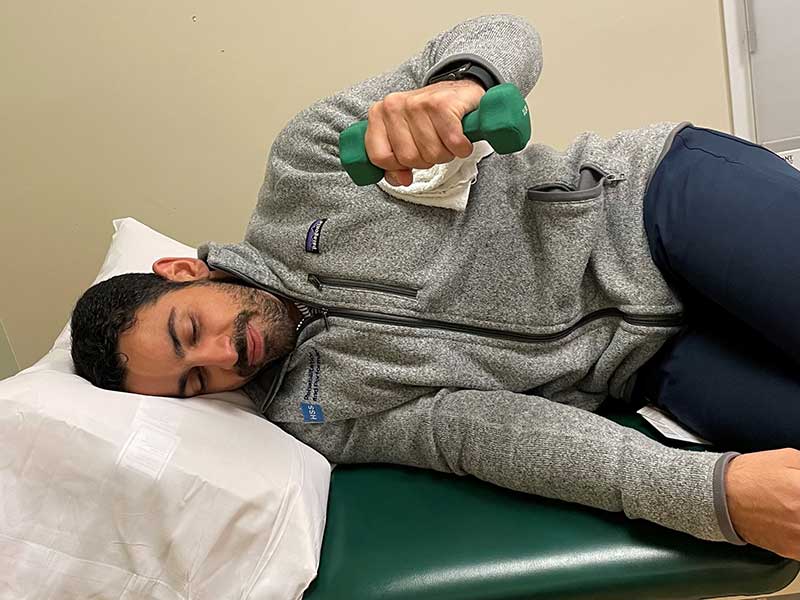
Use the same rolled-up towel under your arm as in the first exercise. (The towel makes the arm position more efficient and helps prevent overcompensation.)
- Lie on your non-injured side with your head resting on a pillow in a neutral position.
- With your top arm bent at a 90-degree angle in front of you, lift a light weight (Hershfield recommends starting with a one-pound water bottle) from the surface you’re on straight up until it is in line with your shoulder.
- Lower it slowly back down.
- Repeat the lift for three sets of 10 or, if your body can tolerate it, go straight through to 30. Eventually, you can increase the weight up to five pounds.
Shoulder Scaption Exercise
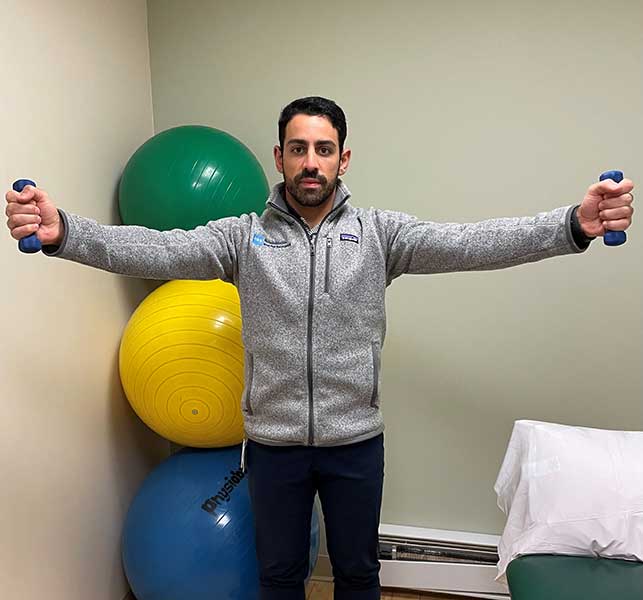
- In a standing position, hold a water bottle or light weight in one hand by your injured side.
- Slowly lift that arm until it is fully extended at a 45-degree angle away from your body.
- Slowly lower the arm back down to your side.
- Repeat the lift for three sets of 10, pausing between sets if needed to decrease shoulder burn, or go straight through to 30. Gradually, you can increase the weight up to five pounds.
When to See a Specialist for Shoulder Pain
If you repeat these exercises daily, you should expect to feel an improvement in shoulder pain within about two weeks, Hershfield says. If you’ve gone six weeks without results, or the pain is worsening or causing sleeping difficulties, it’s time to seek treatment from a physical therapist or physiatrist. These specialists can provide hands-on, individualized care.
Hershfield advises seeking medical care immediately if you experience shoulder pain in combination with any of the following red flags:
- chest pain, nausea, vomiting, fever;
- a trauma, such as a fall or car accident; or
- pain radiating from the neck to past the elbow, associated with numbness and tingling.